Henry’s Ecclectic Nursery
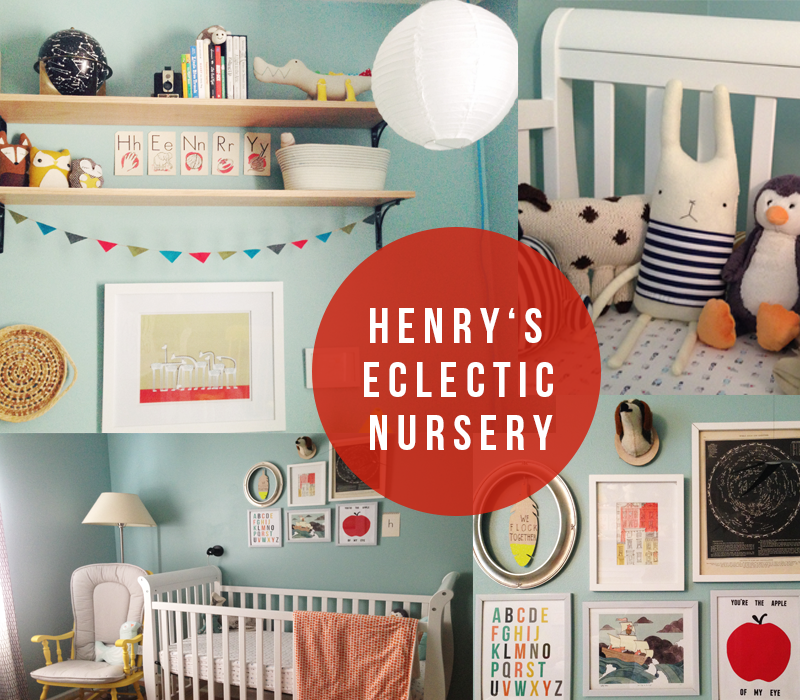
It used to be that clothes, toys, and decor for kids would never be described as “cool” or “modern.” In the last ten years there has been an amazing surge of in-the-know designers whose mission has been to make things for tots that fit in with their parents hipper aesthetics. I feel endlessly grateful to be living in times such as these. The potential that exists to turn kid spaces into fun extensions of the rest of home means no more cookie-cutter decor or sacrificing your creativity or design chops for safety. Yes dear parents, you can have it all.
When I started working on my son’s nursery I had three goals in mind: 1. it had to be functional 2. it had to be fun 3. it had to be affordable. The last one was especially important because our budget for the bean’s room was almost nil. Like most people with no money and big ideas, I turned to Pinterest. I looked for decor ideas I loved that I could easily DIY and found tips on making the most out of the tiny space I had to work with. The result is a space that I love to be in that feels like my son’s room rather than a generic “boys” room. Obviously you have your own taste, budget, and skill level so my way is one way to do things, not the only way. As someone who finds it super helpful to see different layouts/styles/storage/ect. when it comes to decorating, I thought I would do a breakdown of what I bought and how I saved to make my kiddos a room a happy space.
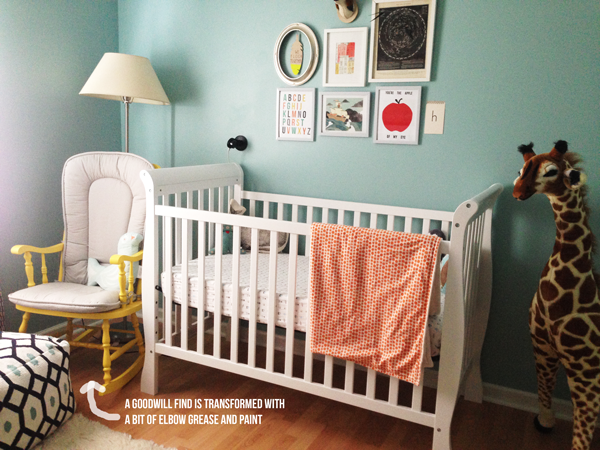
First, let’s be real. That adorable cluster of framed art above my kiddos crib? That only works when your kiddo is little enough to not be able to reach them and pull them down on their sweet little heads. The solution: remove the frames, move the frames up higher out of the reach of curious hands, or use command strips. Command strips seriously work and I always buy the heavy duty strips regardless of how heavy the frame actually is. That said, no solution is foolproof so please do what you feel comfortable with. There will be plenty of opportunity for art over the bed once your kiddo is a bit older.

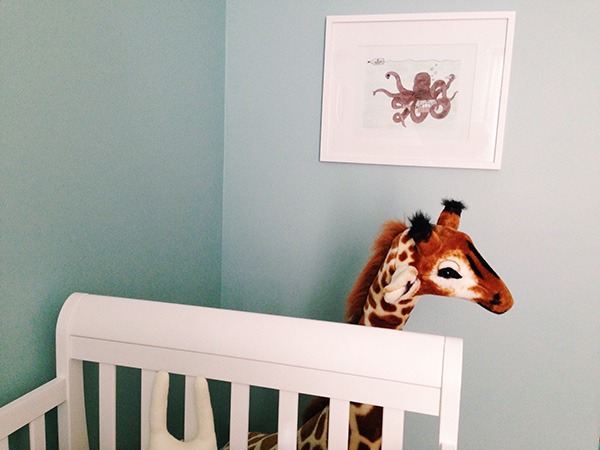
In terms of the art I chose, I wanted an eclectic mix since the room itself has no real theme. To reflect that, I also chose to arrange the frames in a way that felt fun and not so deliberate. The art starting at bottom left and going clockwise: Alphabet print, We Flock Together wood feather (no longer available) in oval vintage frame, city illustration from a vintage kids book, dog mount, vintage constellation chart, vintage flash card, Apple Print, Fox Print. The frames were ones we already had on hand. The octopus art on the other wall above the giraffe was from here.
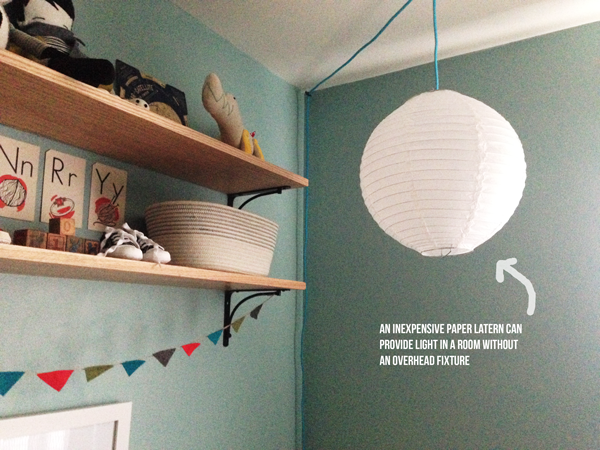
This room didn’t have any overhead lighting so I had to think out of the box a little since we didn’t have the money to wire a new light in here. I already had the paper lantern and the fun blue fabric cord (total about $15) so I strung it up in the corner next to the changing table dresser and it puts out plenty of light for the space. My husband and I built the shelves using wood and brackets purchased at Home Depot. I made the bunting using felt, twine, and double sided tape (yes I could have sewed it but it was a last minute addition and I was SUPER pregnant at the time). It’s been six months and it hasn’t fallen apart yet!
The rocker was a Goodwill find that I painted with spray paint. I used this and haven’t had any issues with flaking or chips. I would recommend doing this in a garage or outside on a large tarp to deal with over spray. It took a full 24 hours for it to cure after doing multiple thin coats. Total time from start to finish was about two days to allow for adequate drying time. I would also make sure to clean your piece thoroughly and sand between coats. The ottoman came from Target on sale ($30) and the rocker pad was a gift from my parents.
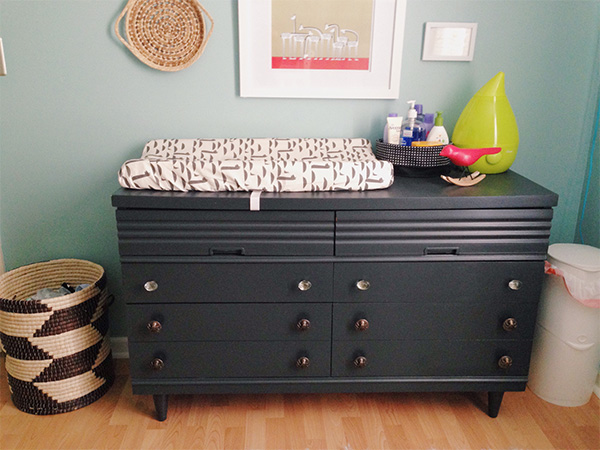
The biggest project I took on was painting my son’s dresser/changing table. It was a Craigslist find that we had sitting in our basement for the last couple of years. I loved the style but it was beat up and sad looking. Unfortunately I didn’t think about taking a “before” picture at the time because I was pregnant. Nuff said. I would love to tell you that this project was super easy and cheap but alas, it wasn’t. Now it’s definitely cheaper in terms of getting a furniture piece that’s custom to your style and needs but you will need to purchase a few things if you don’t have them on hand already. First I cleaned the dresser since it was covered in dust and spider webs. Once it was clean I used this along with low grit sandpaper to prep it for painting. Next I used Zisser primer (two coats) and let it dry for 24 hours. I would HIGHLY recommend using primer despite what some DIY enthusiasts say. It not only makes color truer but it bonds the paint to the piece without having to spend hours sanding. After the primer dried I painted it grey. It took about 3-4 thin coats (thin coats will keep things nice and smooth) and again, I let it dry for a full 24 hours. The final step was to add a poly coat to keep the paint from chipping since it’s going to get a lot of use. The drawer pulls were from Hobby Lobby and I bought them when they had them 50% off. I think I got all 12 for around $22. Not too shabby. I absolutely LOVE it! It’s totally functional but also fun and it doesn’t scream “baby” so it can grow with him too.
Being flexible in terms of design and re-purposing things we already owned saved us a ton of money and forced me to get creative so that I could have a nursery space I loved without needing a wad of cash. Things we repurposed included the flokati rug, the basket next to the changing table/dresser that we use as hamper, the paper lantern, and the floor lamp behind the rocker. While it’s great if you have a large budget for your nursery (or any space in your home) it was really fun to make my vision a reality using DIY projects, thrift store finds and stuff we already had around the house that we weren’t using. I encourage everyone to approach your kiddos space as a blank slate that you can project your personal loves onto. Before you know it, they will be teenagers and your decorating ideas will be unwelcome. Enjoy it while it lasts!
Psst…Henry’s nursery was included in this gender-neutral nursery round up on Huff Po!